In a previous article we walked through the process of hosting our Asp.Net Core Web Microservice within Service Fabric and also self-hosting outside Service Fabric via Kestrel for development and debugging. Today we’ll discuss how we can create a new .Net Core Service Fabric Microservice targeting the full stack (.net46), given the VS 2015 template only supports web projects currently. Note that similar principles would apply to converting existing Microservice projects to .Net Core xproj structure.
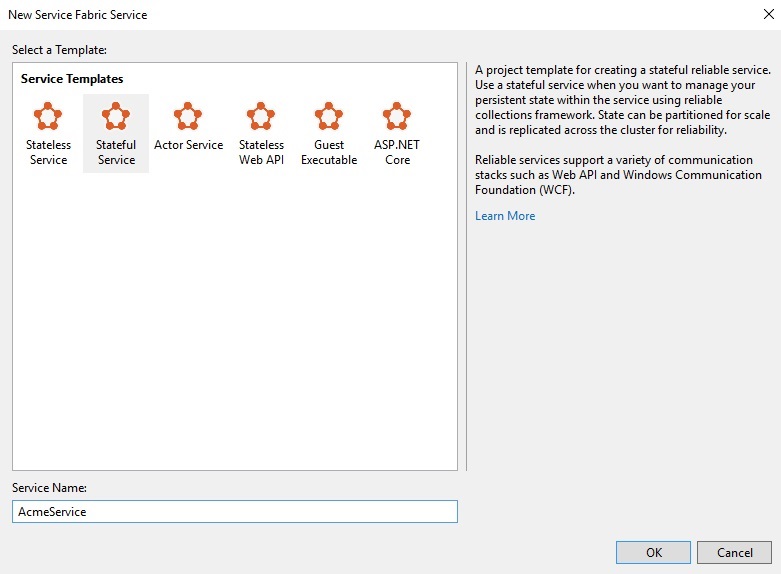
To begin, in Visual Studio 2015 add a new Service Fabric Project, in my example a Stateful Service named AcmeService:

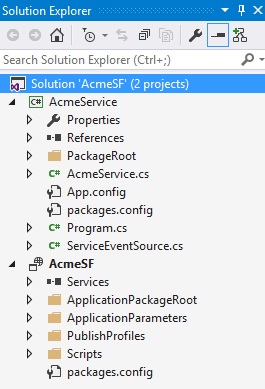
Once complete you should have a solution resembling the below:

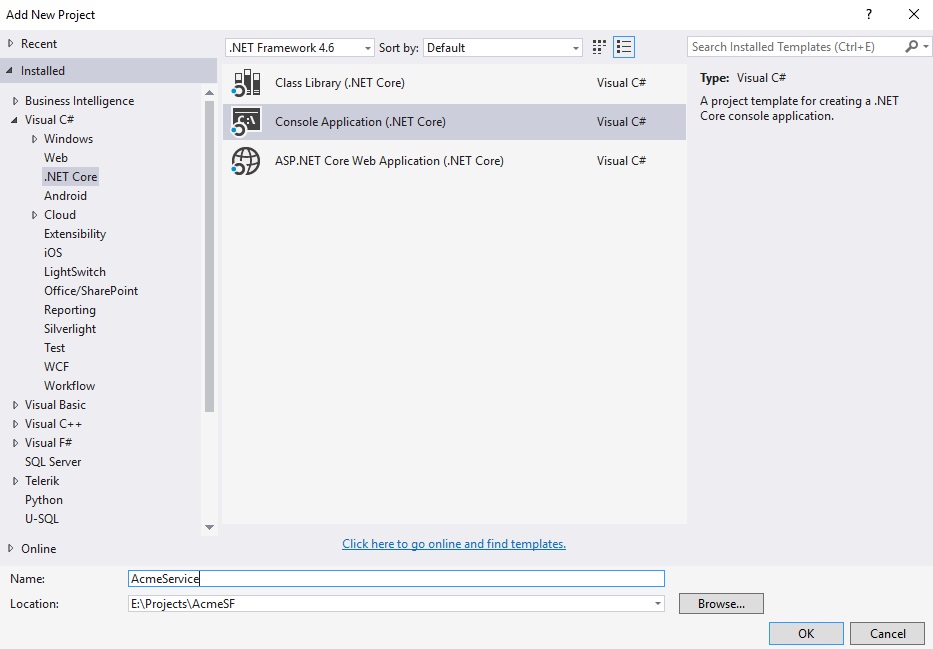
What we do next is remove the AcmeService project from the solution altogether and rename the folder to AcmeService.tmp. We will re-create the project as a .Net Core Console Application. Select Add New Project and select Console Application (.Net Core), making sure the location is the same as the original and enter AcmeService as the project name:

From the AcmeService.tmp folder copy:
PackageRoot folderProperties folderAcmeService.cs (copy over target file)Program.csServiceEventSource.cs
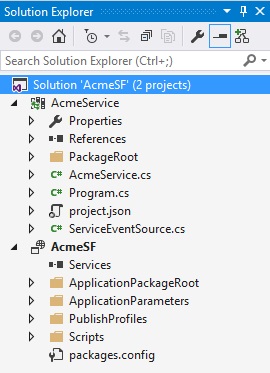
to the AcmeService folder, your solution resembling:

Copy the contents of the below into your project.json file:
1 | { |
Lastly we have to add back our .Net Core Console Application project by right clicking on the Service Fabric project and selecting Add Existing Service Fabric Service. You might get a warning about updating but just click OK. You can also delete the AcmeService.tmp folder as it’s no longer needed.
To compile you can use Visual Studio or at a command prompt you can issue normal dotnet.exe commands, for example:
dotnet.exe build
In the next series of articles we’ll look at some more advanced topics such as sharing appsettings.json files between Web and other Microservice projects, as well as logging to Application Insights.